Using Mixins to patch a Wisej class
Have you ever tried to modify the layout of an existing Wisej control using a Mixin? By this I don’t mean the Mixin.Theme (which is described here). I mean this: Mixins. In this post, I’ll show you how it works.
The documentation linked above says:
"Mixins are collections of code and variables, which can be merged into other classes. They are similar to classes but cannot be instantiated. Unlike interfaces they do contain implementation code. Typically, they are made up of only a few members that allow for a generic implementation of some very specific functionality. Mixins are used to share functionality without using inheritance and to extend/patch the functionality of existing classes."
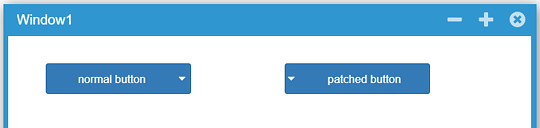
This sounds quite complicated, but it isn’t. I’ll show you in a short demo, how easy it is to patch an existing Wisej class (not theme) and change the default layout of a "wisej.web.Button" control, which has MenuItems. Usually the DropDown Arrow, which appears when MenuItems are available for a button, is located on the right side of the button text. If you like to display the DropDown Arrow on the left side, you can easily achieve this with a Mixin.
Build up the demo scenario
- Create a new Wisej WebApplication and add 2 buttons in the Window1 Designer.
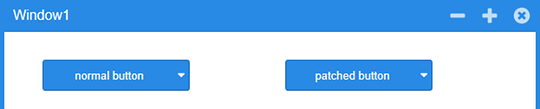
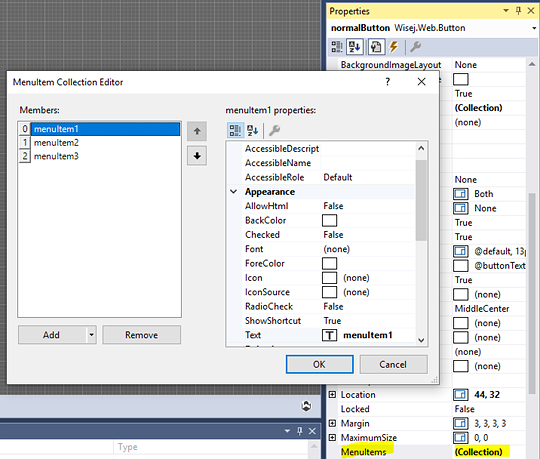
- Add some items to the MenuItems collection, so that the DropDown Arrow is visible.
Implement the patchedButton Mixin
- Add a new folder "Platform" to the project and a new Javascript file. I named it "patchedButton.js" (a). For the JS file we must set the Build Action to Embedded Resource (b) and also uncomment the WisejResources line in AssemblyInfo.cs (c).
Figure (a)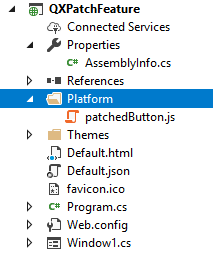
Figure (b)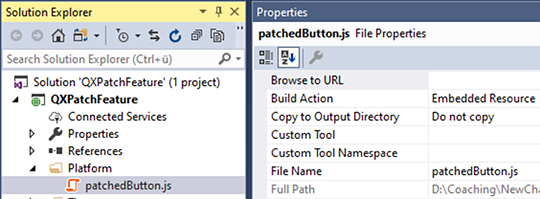
Figure (c)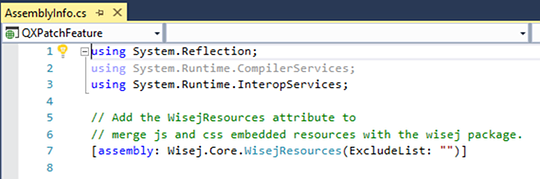
- Within the patchedButton.js file, we override the _createChildControlImpl function and change the following:
- Define the patchedButton Mixin,
- apply the patch to the wisej.web.Button class.
qx.Mixin.define("patchedButton", {

    members: {

       // overridden
       _createChildControlImpl: function (id, hash) {
           var control;

           var usepatchedButton = this.getAppearance() === "patchedButton";
           switch (id) {

              case "arrow":
                 control = new qx.ui.basic.Image().set({
                    visibility: "excluded",
                    anonymous: true,
                    alignX: "center",
                    alignY: "middle"
                 });
                 if (usepatchedButton) {
                     this._add(control, { row: 0, column: 0 });
                 }
                 else {
                     this._add(control, { row: 0, column: 2 });
                 }
                 break;

              case "label":
                 control = this.base(arguments, id, hash);

                 if (usepatchedButton) {
                     control.setLayoutProperties({ row: 0, column: 2 });
                 }
                 else {
                     control.setLayoutProperties({ row: 0, column: 1 });
                 }
                 break;

              case "icon":
                 control = this.base(arguments, id, hash);

                 if (usepatchedButton) {
                     control.setLayoutProperties({ row: 0, column: 1 });
                 }
                 else {
                     control.setLayoutProperties({ row: 0, column: 0 });
                 }
                 break;
           }

           return control || this.base(arguments, id);
       }
    }

});

// applies the patch.
qx.Class.patch(wisej.web.Button, patchedButton)
As you can see, the trick is the change of the column order of the LayoutProperty. The code which I added to the default implementation is highlighted.
You will find this function for each Wisej control. You can look it up with the help of the developer tools of your browser; open it with F12.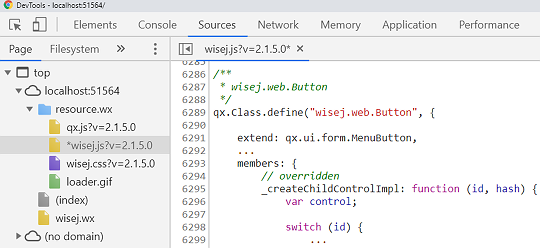
Create a new AppearanceKey for this demo
Now we’ll create a "patchedButton"-AppearanceKey for our demo. This is only needed to activate the JS code of the true-cases in our if-conditions. Usually, you won’t have such if-conditions to distinguish between applying or not applying a patch. You’ll want the feature for all buttons.
In order to work for all buttons, the JS-code would be like this:
qx.Mixin.define("patchedButton", {

    members: {
       // overridden
       _createChildControlImpl: function (id, hash) {
          var control;
          switch (id) {
             case "arrow":
                control = new qx.ui.basic.Image().set({
                   visibility: "excluded",
                   anonymous: true,
                   alignX: "center",
                   alignY: "middle"
                });
                this._add(control, { row: 0, column: 0 });
                break;
             case "label":
                control = this.base(arguments, id, hash);
                control.setLayoutProperties({ row: 0, column: 2 });
                break;
             case "icon":
                control = this.base(arguments, id, hash);
                control.setLayoutProperties({ row: 0, column: 1 });
                break;
          }
          return control || this.base(arguments, id);
       }
    }
});
// applies the patch.
qx.Class.patch(wisej.web.Button, patchedButton);
To limit the patchedButton feature we’re using an AppearanceKey. Look, how this works:
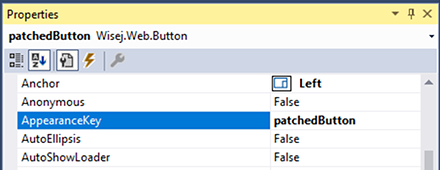
- Set the AppearanceKey for the button in the Designer to "patchedButton".
- Add a new Mixin Theme to the project and set Build Action to Embedded Resource.
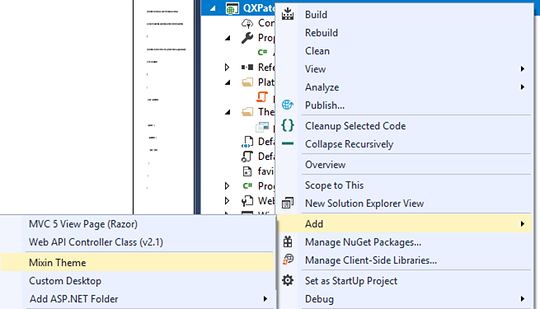
NOTE: If the menu entry doesn’t exist, you can get it with the following steps:
- Right click on the project in Solution Explorer
- Add -> New Item
- In the opened window, left tree, select view Visual C# -> Wisej2
- In the middle list, select "Mixin Theme", enter a name (e.g. "patchedButton") and click the Add button
- Add a new Appearance Key and inherit from "button".
{
  //"name": "patchedButton"
  "appearances": {
    "patchedButton": {
      "inherit": "button"
    }
  }
}